A dripping tap left alone for a month can waste over 5,500 litres of water. A slow-draining sink ignored for weeks can turn into a full blockage requiring professional intervention that costs hundreds of pounds. The truth is, most plumbing disasters start as tiny, manageable faults that any homeowner can fix with the right know-how. This guide walks you through everything: what tools you need, how to clear a blocked sink, how to fix a running toilet, and how to test your repair so you can be confident the job is actually done.
Table of Contents
- What you need before you start: Tools, materials, and safety
- Clearing a blocked sink: Step-by-step process
- Fixing a running or leaking toilet: Step-by-step instructions
- Testing your repair and avoiding common mistakes
- Lessons learned and what most guides leave out
- Professional help on hand when you need it
- Frequently asked questions
Key Takeaways
| Point | Details |
|---|---|
| Start simple | Most common plumbing faults can be fixed easily with the right tools and a stepwise approach. |
| Safety matters | Wearing protective gear and avoiding harsh chemicals prevents accidents and long-term pipe damage. |
| Test thoroughly | Always check your repair under pressure to ensure no leaks or repeat issues. |
| Know your limits | DIY plumbing is effective for small fixes, but call a professional for persistent problems or major leaks. |
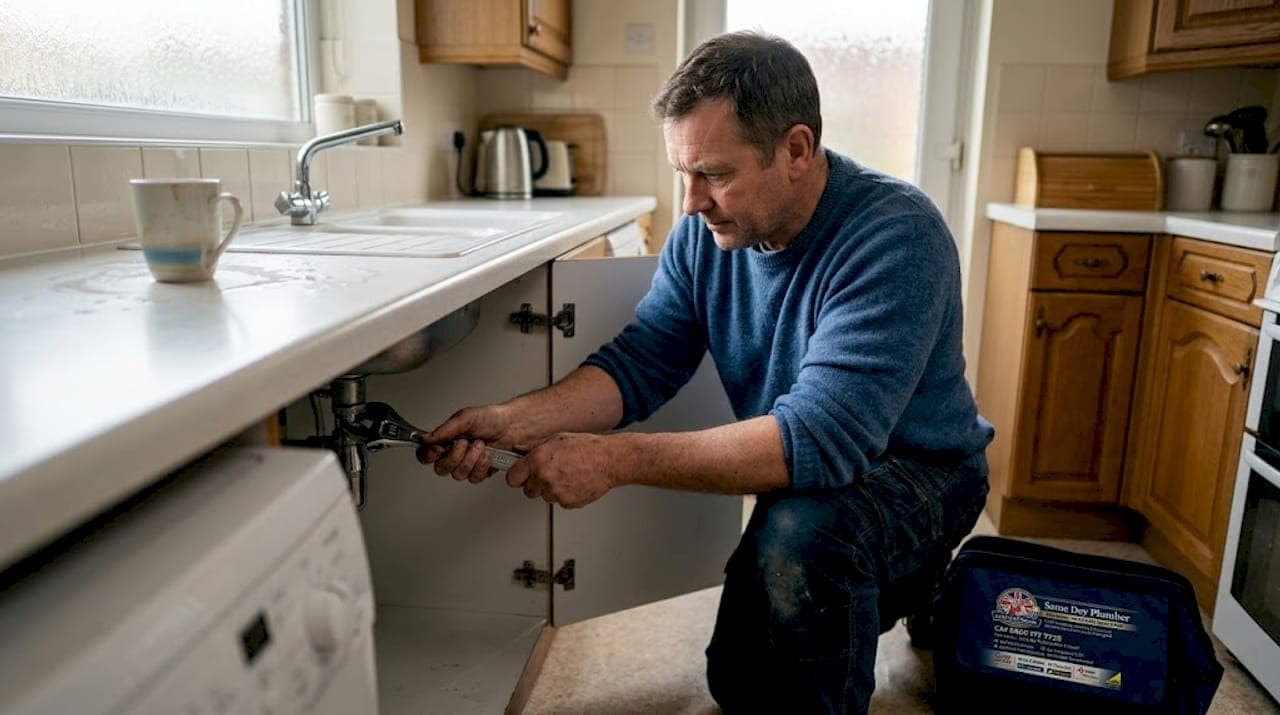
What you need before you start: Tools, materials, and safety
Now that you know why tackling issues early matters, let's make sure you're properly equipped and safe before getting started. Walking up to a leaking pipe with the wrong tools is how a ten-minute job turns into a two-hour ordeal. Take five minutes to gather everything first.
Essential tools and materials
Here's a quick-reference comparison of what you'll need for the most common minor repairs:
| Repair type | Essential tools | Materials needed |
|---|---|---|
| Blocked sink | Plunger, drain snake, bucket | Baking soda, white vinegar, boiling water |
| Running toilet | Adjustable spanner, flathead screwdriver | Replacement flapper, fill valve, chain |
| Leaking tap | Adjustable spanner, Allen key | Replacement washer, O-ring, PTFE tape |
| General repairs | Torch, rubber gloves, old towels | Plumber's grease, sealant |
Beyond the tools themselves, you'll also want to keep these items on hand before you start any repair:
- Rubber gloves to protect against bacteria in drain water
- Safety goggles if you're working with any cleaning solutions or dislodging debris
- Old towels and a bucket to catch water when you open pipes
- A torch so you can see inside cabinet spaces and behind cisterns
- A phone or tablet nearby to reference diagrams or instructions mid-job
Safety rules you should not skip
There are a few habits that separate a successful DIY repair from one that makes things worse. Overtightening fittings damages plastic and can crack pipes or connectors, so firm and snug is always enough. Chemical drain unblockers are powerful, but they harm rubber seals and corrode older pipes if misused. Small drips, if ignored, run up water bills and can cause structural damp over time, so never dismiss them as harmless.
Remember: Always turn off the water supply before opening any pipe or valve. Your stopcock is usually located under the kitchen sink or near the water metre. Know where yours is before any repair begins.
The golden rule is: do not force anything. If a fitting won't budge, it needs lubricant or a different approach, not extra muscle.
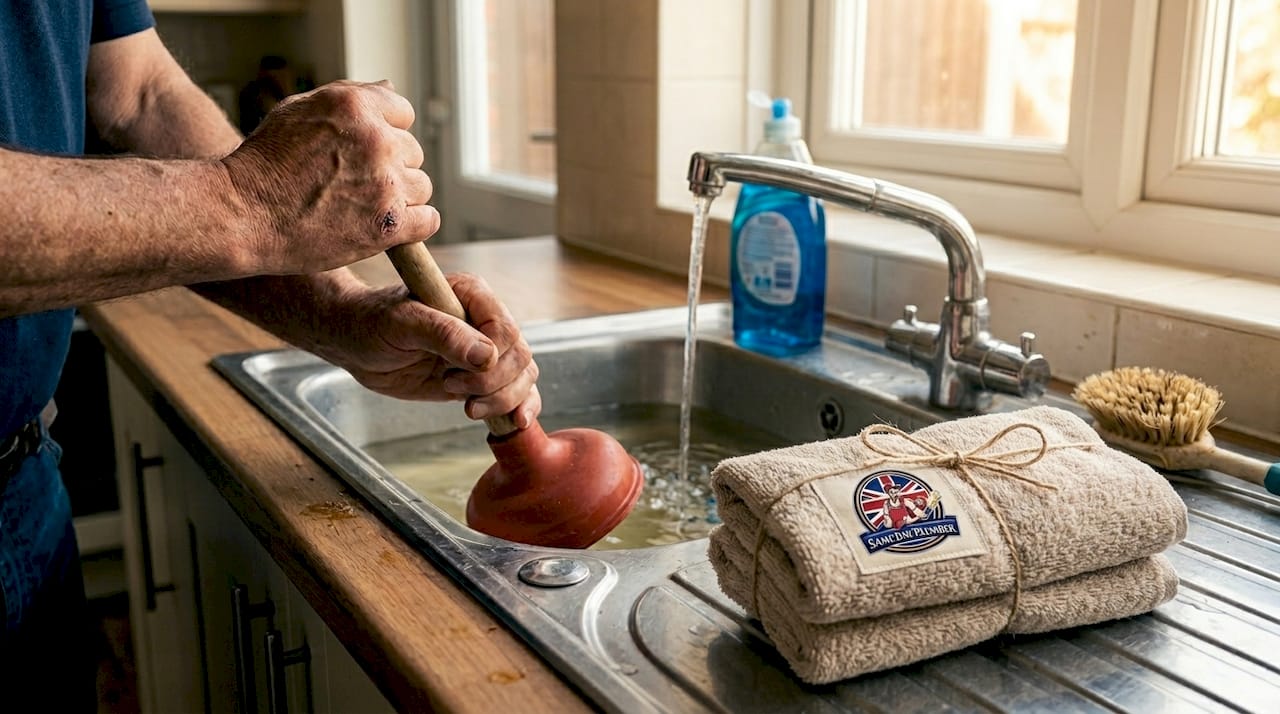
Clearing a blocked sink: Step-by-step process
With your tools ready, let's tackle one of the most common home plumbing headaches: the blocked sink. Most sink blockages form gradually as grease, food debris, soap residue, and hair accumulate in the trap, which is the curved section of pipe under the sink designed to hold a small amount of water.
What causes blockages and what to avoid
Before reaching for any solution, it helps to understand what made the problem. Coffee grounds, cooking oils, and fibrous food waste are the main culprits in kitchen sinks. In bathrooms, hair and soap scum dominate. To unblock a sink, start with plunging and only escalate if that does not work.
Avoid pouring oils, coffee grounds, or pasta water down the drain going forward. They congeal inside the trap and create blockages that grow steadily worse.
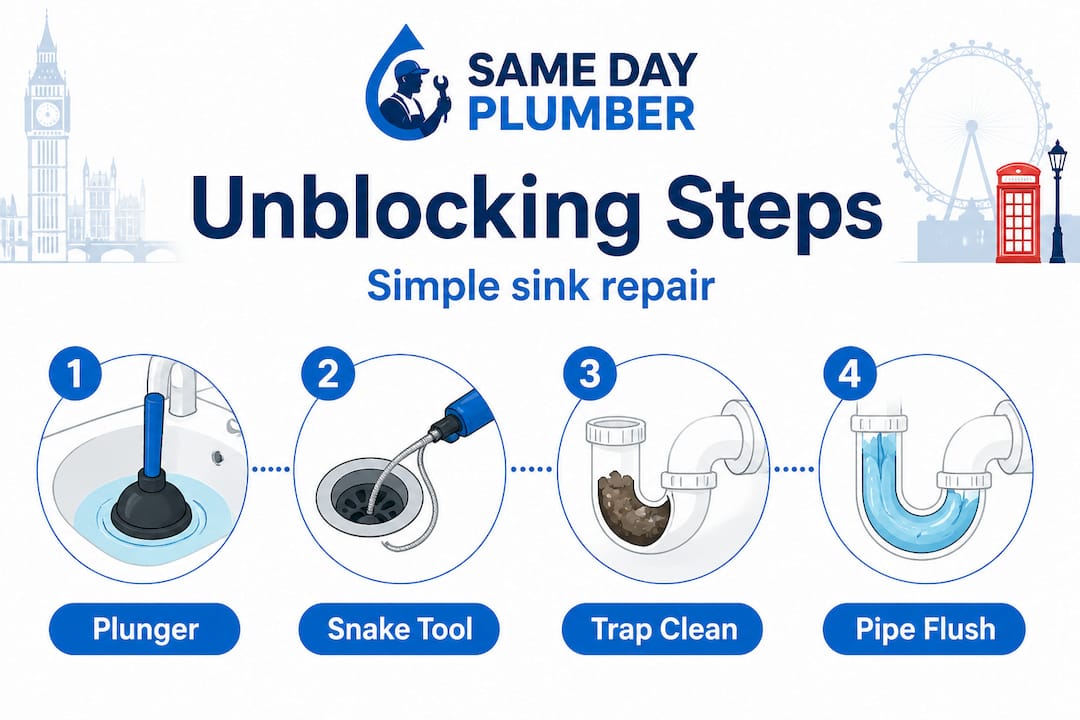
Step-by-step unblocking method
- Remove visible debris. Pull out any hair or food matter sitting in the drain opening. Use rubber gloves. It's unpleasant but essential.
- Add water to create a seal. Fill the sink with enough water to cover the cup of the plunger. This water seal is what makes plunging effective. Without it, you're just pushing air.
- Plunge firmly. Place the plunger directly over the drain opening and push down, then pull up sharply. Repeat 10 to 15 times with consistent pressure.
- Test the flow. Remove the plunger and see if the water drains. If yes, flush with hot water for a minute to clear residual debris.
- Try baking soda and vinegar if plunging fails. Pour half a cup of bicarbonate of soda into the drain, followed immediately by half a cup of white vinegar. The fizzing reaction loosens organic buildup. Leave it for 20 minutes, then flush with boiling water.
- Use a drain snake for stubborn blockages. Feed the flexible cable into the drain until you feel resistance. Rotate the handle to break up or hook the blockage, then slowly withdraw.
| Method | Best for | Time needed | Cost |
|---|---|---|---|
| Plunger | Soft, recent blockages | 5 minutes | Under £5 |
| Baking soda and vinegar | Grease and soap buildup | 25 minutes | Under £2 |
| Drain snake | Deep or solid blockages | 10 to 20 minutes | £10 to £30 |
| Professional unblocking | Persistent or recurring clogs | Varies | £80 to £200+ |
Pro Tip: If you have a double sink, block the second drain opening with a wet cloth before plunging. This stops air escaping through the other side, which makes your plunging much more effective.
If after all three methods the sink still drains slowly or not at all, the blockage may be deeper in the main waste pipe. At that point, it is worth calling in a professional rather than risking damage to your pipework.
Fixing a running or leaking toilet: Step-by-step instructions
Having mastered sink unblocking, it's time to solve another common household frustration: the constantly running or dripping toilet. A running toilet can waste up to 400 litres of water per day, which adds significant amounts to your water bill without you even noticing. The fix is usually straightforward once you know what part has failed.
Identifying the source of the problem
The toilet cistern has three main components that commonly fail. Understanding which one is causing the issue saves you time and money on unnecessary replacements.
- The flapper valve sits at the bottom of the cistern and controls water flow into the pan. If it's worn or cracked, water constantly seeps through, causing the cistern to refill endlessly.
- The fill valve and float control when the cistern stops filling after a flush. If the float sits too high, water overflows into the overflow pipe, causing that familiar trickling sound.
- The chain connects the flush handle to the flapper. If it's too short, the flapper can't close fully. If it's too long, it can get caught under the flapper and cause a permanent leak.
Tell-tale signs your toilet needs attention include a continuous hissing or trickling sound, visible water dripping from the base of the cistern, and a tank that takes unusually long to refill after flushing. You can fix a running toilet by replacing the flapper valve or adjusting the fill valve and float, both of which are very achievable DIY tasks.
Step-by-step toilet repair
- Turn off the water supply. The isolation valve is usually on the pipe that leads into the cistern. Turn it clockwise to close.
- Flush to empty the cistern. This gives you a clear view of all components and reduces the amount of water you'll be working around.
- Remove the cistern lid and set it aside safely on a flat surface.
- Inspect the flapper. Press down on it with your finger. If the trickling noise stops, the flapper isn't sealing properly and needs replacing. Check it for cracks, warping, or mineral deposits.
- Check the chain. There should be roughly 1 to 2 centimetres of slack. Too tight and the flapper cannot close. Too loose and it gets trapped underneath.
- Inspect the float. In older toilets, this is a ball float on a metal arm. Bend the arm slightly downward so the float sits lower, which will stop the cistern overfilling. In newer siphon-style cisterns, adjust the float clip on the fill valve.
- Replace worn parts. Flappers are inexpensive, typically under £5, and available in most hardware shops. For detecting and repairing small leaks inside the cistern, always check washers and O-rings for signs of deterioration while you have everything open.
- Turn the water back on and allow the cistern to fill. Listen carefully and watch for any overflow or dripping.
Pro Tip: Drop a small amount of food colouring into the cistern and wait 15 minutes without flushing. If the colour appears in the toilet bowl, you have a confirmed flapper leak, which points you straight to the fix without any guesswork.
Testing your repair and avoiding common mistakes
Once you've completed your repair, don't forget to verify everything's secure and functioning correctly. Many DIY repairs fail not because the technique was wrong, but because the testing was skipped or rushed.
How to pressure test your repair
Test repairs under pressure by turning the water supply back on slowly and watching every joint and connection point carefully. Do not just glance at it. Get a torch and inspect closely for any moisture, discolouration, or dripping. A joint can look fine but have a slow weep that only becomes visible after a minute or two of water pressure.
- Restore the water supply slowly. Turn the valve or stopcock gradually, not all at once.
- Run water through the repaired area for at least two minutes at normal pressure.
- Check all joints and connections with a dry piece of tissue or kitchen paper. Any moisture will show up immediately.
- Check pressure testing after repair is done correctly by repeating the check after 30 minutes, since some slow leaks only appear once the system is fully pressurised.
- Test the drain by filling the sink and watching it empty completely without backing up.
Common mistakes to avoid
Even experienced DIYers fall into these traps:
- Overtightening connections. Finger tight plus a quarter turn with a spanner is typically enough for most plastic fittings. Going further risks cracking the fitting and creating the very leak you're trying to prevent.
- Skipping the clean-up. Debris left in a trap or around a flapper valve will compromise your repair within days. Always flush thoroughly after any blockage work.
- Not double-checking replacement parts. A new washer that's the wrong diameter or a flapper that doesn't match your cistern model will fail immediately. Take the old part to the hardware shop for comparison.
Important: If after completing a repair you still hear dripping, notice damp patches on walls or ceilings, or if water is escaping at any point, stop immediately and call a professional. Some issues require specialist tools and knowledge that go beyond standard DIY.
Lessons learned and what most guides leave out
Most plumbing guides give you the steps but skip the part about mindset. Here's the honest reality after seeing hundreds of home plumbing issues: the majority of serious problems trace back to one of two things. Either a small drip was ignored for too long, or someone forced a fitting that wasn't cooperating.
The hidden cost of chemical misuse is something very few guides address directly. Homeowners reach for a bottle of chemical unblocker because it feels decisive and easy. But these products can degrade rubber seals, weaken plastic pipe joints, and make the underlying blockage harder to remove mechanically later. You end up with a bigger problem than you started with.
The same logic applies to tools. Using an adjustable spanner on a delicate plastic compression fitting instead of hand-tightening it is a fast route to a cracked joint. The right approach is always gentler than you think.
Here are some honest truths worth sitting with:
- Know your limits. If you've had to attempt the same repair three times, the problem may be structural or beyond the trap. Persisting past that point risks making things worse and more expensive.
- A missed leak has a real cost. Even a minor seep behind a cabinet can lead to mould, rot, and insurance complications over months. The cost of ignoring it almost always exceeds the cost of acting early.
- Professional assessment is not failure. Understanding no fix no fee plumbing basics means you can get expert eyes on a problem without financial risk. Sometimes a 20-minute professional look saves you days of frustration.
The mindset shift worth making is from panic repair to prevention. Check under your sink once a month. Listen for sounds that are new or unusual. Act on small drips before they become big ones. That single habit will do more for your home than any single fix.
Professional help on hand when you need it
Sometimes a repair holds for a day and then fails again. Sometimes what looks like a blocked sink is actually a sign of a deeper issue in the main waste stack. When your own efforts aren't enough, you need fast, reliable help without the worry of unexpected costs.

Same Day Plumber is available 24 hours a day, seven days a week, and there's no call out charge. If a job can't be fixed, you don't pay. Whether you need a trusted local plumbing service for a planned repair or an emergency plumber in Reading when something goes wrong at midnight, the team is ready to respond quickly and get it sorted properly the first time. Major leaks, repeat failures, and anything involving the main supply line are jobs for trained professionals, and there's never any shame in making that call.
Frequently asked questions
Can I use chemical unblockers for every drain?
You should avoid harsh chemicals except on grease or soap clogs, as chemicals harm pipes and seals and can cause more damage than the original blockage.
How do I know if my toilet needs a new flapper or just an adjustment?
A flapper with visible wear, cracks, or mineral buildup should be replaced. If the flapper looks undamaged, check seals and chain slack and try adjusting the float position first.
Is there any risk to overtightening plumbing fittings?
Yes, overtightening damages plastic fittings and can crack them, creating a new leak rather than fixing the original problem.
How do I test for leaks after a repair?
Turn the water back on slowly and check all joints under pressure for drips or moisture. Test repairs under pressure and repeat the check after 30 minutes to catch slow weeps.
When should I call a professional plumber?
If leaks persist after repair, if you notice water damage to walls or floors, or if you're simply not confident in what you're dealing with, seek professional help straight away rather than risking further damage.